Specifications
Plotter Characteristics
Waypoints/icons
12,000 user waypoints with name, symbol,
3 system waypoints: MOB,Start,cursor
10 proximity waypoints
Routes
30 routes waypoint up to 170 points each,
plus MOB and Track Navigation or Goto Track modes
Tracks
8,000 points automatic track log;
10 saved tracks (up to 8000 track points each)
lets you retrace your path in both directions
Alarms
XTE, Anchor drag, arrival, speed, voltage, proximity waypoint,
Timer and AIS (CPA and TCPA) alarm
Drawing
1000 Drawing Marks; 2000 Drawing Lines (40 points each);
1000 Drawing Place Name; 8 colors for Drawing
Pallete
Normal
Daylight exposed to sunlight
Night in dark environment
NOAA paperchart colors
Tides
Built-in Worldwide Tide Data
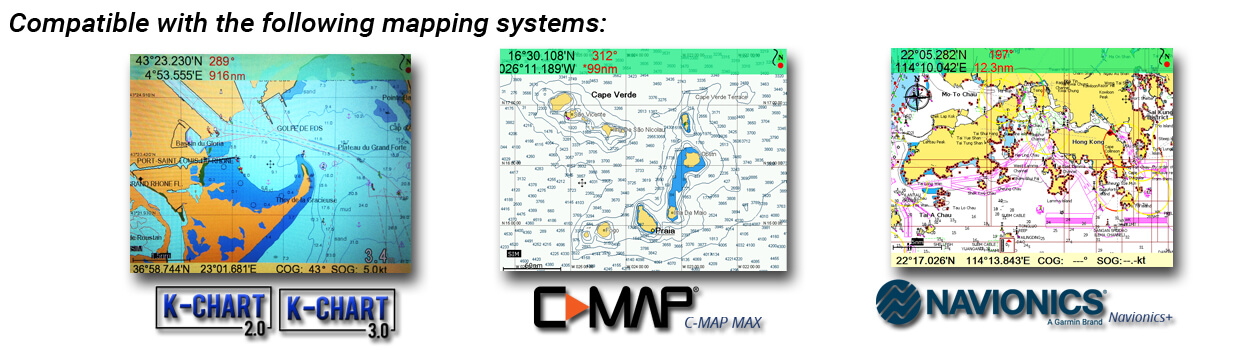
External Map
Compatible with K-Chart 2.0, K-Chart 3.0, C-Map Max and Navionics+
User Data Storage
Internal backup of user settings or external SD-card
Plot Interval
5secs to 60 mins or 0.01 to 10nm
Plotting Scales
0.001 to 700nm
Perspective view
On/off (available for C-Map only)
Celestial
Sunrise/Sunset Moonrise/Moonset
GPS Receiver Characteristics
Receiver
50 parallel channel GNSS receiver continuously tracks and
uses up to 50 satellites to compute and update your position
Acquisition time
Cold start: 29 seconds
Hot start: 1 second
Update rate
1 second or 0.1 second selectable
Accuracy
Position:3 meters(95%) without S/A
Velocity: 0.1 meter/sec without S/A
Satellite System
Choice of 4 GNSS: GPS, Beidou, GLONASS and Galileo
Dynamics
Altitude: 18,000 m
Velocity: 515 m/s
Datum
WGS 84 & user defined
GPS Interface
GSP Data
RS232 input/output, NMEA 0183 V3.01 and V4.11
GPS Input Baudrate
Auto Scan (4800, 9600, 19200 and 38400)
GPS Output Baudrate
Selectable among 4800, 9600, 19200 and 38400
AIS Interface
AIS Data
RS232 output VDO, VDM, GGA, GSA, GSV and VTG
AIS Input Baudrate
38,400 from GPS Input Port
NMEA Sentence Supported
INPUT
(Auto scan Baudrate)
GGA, GLL, GSA, GSV, RMC, HDG, HDM, HDT
VTG, ZDA, MTW, VWR, VWT, MWD, VPW, VHW
TLL, TTM, VDO, VDM, GNS, MTA
RMA, DBT, DPT, MWV, BWC, XTE, ZDL, WPL, AAM,
APB, BOD, RMB, DSC, MDA, RPM, XDR
OUTPUT
Baudrate: Selectable 4800, 9600, 19200, 38400
GGA, GLL, RMC, GSA, GSV, AAM, APA
APB, BOD, BWC, BWR, DBT, DPT, HDT
MTW, RMB, TLL, VTG, WPL, XTE, ZDA
ZTG, ZDL, MWD, VPW, VWR, VWT
OUTPUT for Autopilot
APA, APB, BOD, XTE
Power Supply
10.5 to 30VDC, current drain 1.0A at 12V
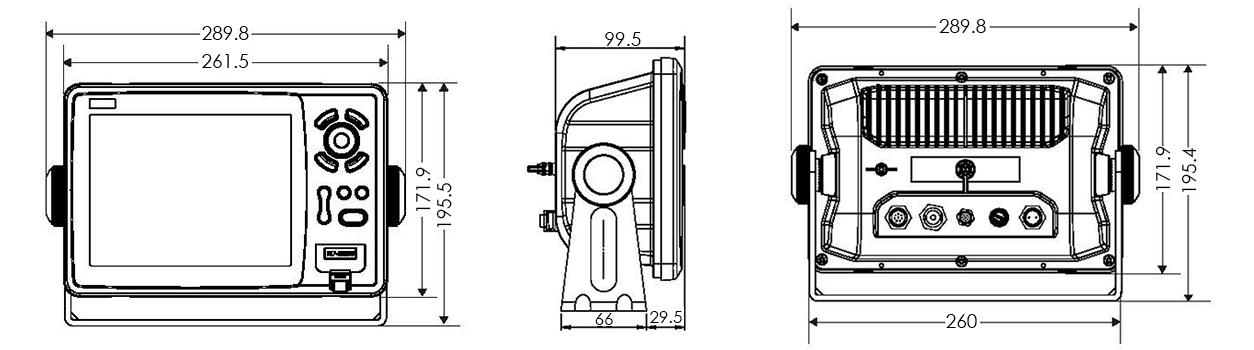
PHYSICAL
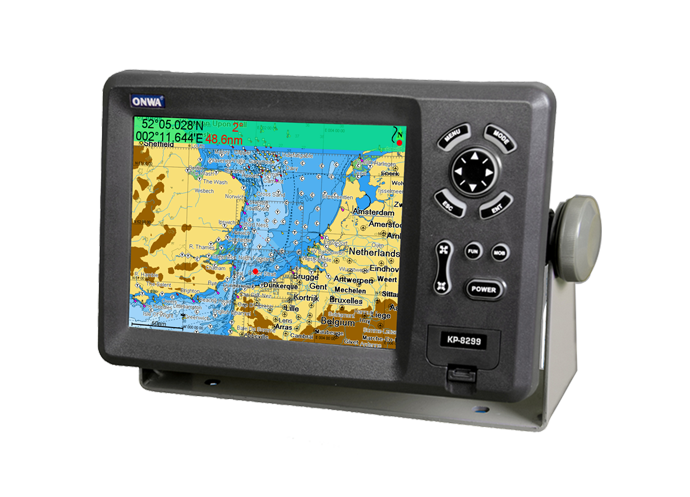
Size
195.5mm(H)X290mm(W)X99.5mm(D)
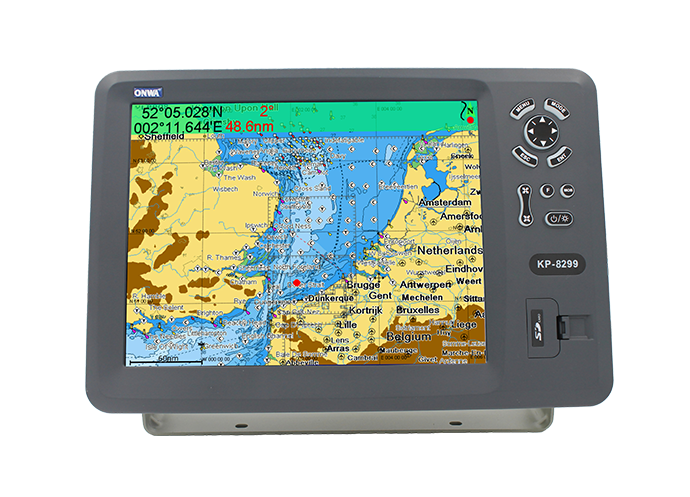
Display
8-inch Color TFT dayview LCD, 800×600 pixels
Waterproofing
Display unit: IP66
Antenna unit: IP66
Temperature range
Display unit: -15℃ to +55℃
Antenna unit: -25℃ to +70℃
Equipment List
Display unit
Quick manual
GPS antenna (10m)
Mounting Brackets
Standard accessories pack